Sunday 18 November 2012

Cards, Cards, Cards

I haven't uploaded any cards to my blog in a long time. However, today I decided to put some cards on Ebay so I photographed a batch of cards for that and thought to update my blog while I was at it :)

Hope you like 'em!


These 3 baby cards are simple and clean. The glitz of the gems and the big bows give them focus.


This card is done using the Cricut Craft Room to merge 3 shapes: square, baby onesie and a duck.


 This butterfly card is from the Cricut Rock Princess cartridge


Panda and noodles are cut from Create A Critter Cricut cartridge, so cute.


This card uses the Lily of the Valley stamp of a boy with his toy boat.  I made this a pea-green boat as my nephew loves the poem The Owl and the Pussy Cat and this reminded me of him.


These 2 cards are made with stamped and paper-pieced image called 'Meet Me at the Cafe' from My Favorite Things.  I love this stamp set, it comes with the awning stamp which allows you to create what looks like a cafe window, I used acetate over the image to make it more windowy.  The fence is made with the Martha Stewart Deep 'Trellis' Edge  punch.


I love the heart border used on this card, it is a Martha Stewart punch called, I think, Heart Lace.  The background paper is from Basic Grey's Lemonade collection - the whole collection is lovely.   The cherries are simply circles punched from pink card and the leaf and stem are cut free-hand.


The stamped image here is from Stamping Bella's Lulu range.  The accents on the bow are made from air-drying clay and Fimo


This cupcake card is cut from the Cricut Create A Critter cartridge, there is so much to this cartridge, much more than just animals.


These cute little girls are Gorjuss Girls...


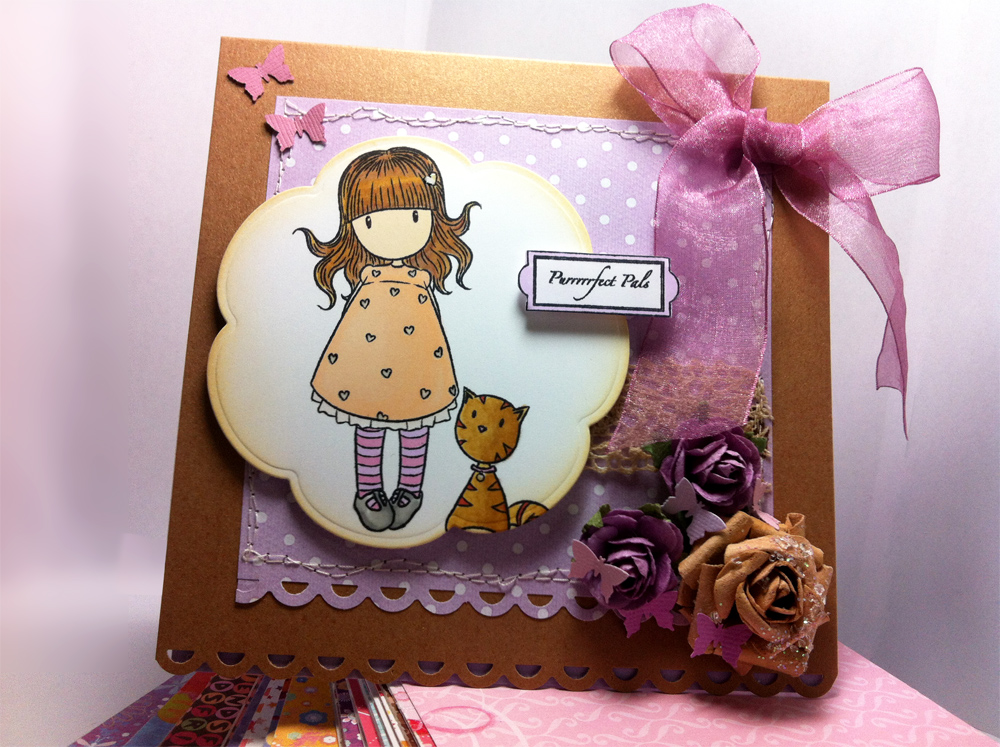
... and the bottom 2 cards have a wheel which you rotate to change the colours/patterns of the dresses, you can see the wheel on the right-hand side of the cards. 


This card is shaped like a jug with cut flowers in - made with Cricut Country Life cartridge.


This card uses Cricut Decals cartridge.


This card has a padded fabric heart on the front, inside are several pages so that the card can be used as a note pad by the recipient.

These 2 cards were made with the Hello Kitty Greetings Cricut cartridge....

 ...and the bottom card is a round stepper card which means it literally rocks \m/


The lollipops on this card are made with circles of acetate.  I swirled PVA glue on and sprinkled liberally with one colour of glitter, once that was dried I did a second swirl and glittered that in a different colour.  I used the sticks off real lollipops.


Bunny and butterfly cut on the Making Memories Slice using Dilly Dally cartridge.  The sentiment is stamped from My Pink Stamper's Punnylicious range....


Cat from Slice 'Zoo-topia' card, sentiment from My Pink Stamper's Punnylicious range


This waterproof lady is cut from the Cricut 'One Upon a Princess' cartridge.


Saturday 28 January 2012

Iris folding

 I made these 2 cards a while ago following patterns from 'Iris Folding' by Michelle Powell.  It is a lovely book, I had never tried iris folding before but found it really easy to follow.

Decoden.....Deco-whatnow?

Whilst looking for Fimo tutorials on Youtube I found some videos of people doing Decoden.  This is a Japenese trend of decorating objects (eg tins, little boxes, mobile phone covers) with really cute little trinkets or cabochons.  These cabochons are usually little cute replicas of food (eg cookies, doughnut) and often made out of different types of modelling clay, eg Fimo, Sculpy, air clay.

The cabochons are then stuck down with a substance that looks like whipped cream but dries hard, there are specially made products for this though they not widely available here in the UK, therefore, I used white bathroom silicone sealant :)  Sounds odd, I know, but when piped through and old piping bag and nozzle, it really does look good.  Here's what I have made so far, the tubs once contained body scrubs from Soap and Glory.   The sprinkles are micro-beads. 

The pieces stuck on these are Fimo,
I made them a long time ago but had no idea what to use them on,
I'm glad I kept hold of them now.


 After making these, I then found a really lightweight clay in the toy section of Home and Bargain called Super Clay .  The light clay is air-dry and needs a few days to dry completely but once dry it is so light that it can be stuck on a card without causing any balancing problems.  When completely dry it feels like a very very firm foam.


After looking at many Decoden videos on Youtube, I saw someone using the kit below which is also a very light clay that dries like a hard foam.  I searched Amazon and found it as an import from Japan.  It was quite expensive really but it comes with lovely little re-usable moulds which I tried with Fimo (not very successful) and the cheap clay from Home and Bargain which worked really well.

The pink, brown and Oreo cookies are made using the cheap kids clay, the blue cookie, wafer and ice-pop are made using the Japanese clay.  The heart cookies is made from Fimo with a pink hot glue stick used for the icing/filing.  Except for the heart cookie, they are made with moulds from the Japanese kit.  Underneath, you can see other little pieces I have made.  


Potentially, the only thing you need to buy to try this is the sealant as you can decorate the 'cream' with anything you already have, even if you just sprinkle with some seed beads it will look yummy scrummy.

Cute little critters

For Christmas, my lovely boyfriend gave me the Create a Critter Cricut cartridge.  It is soooooo cute.  Here are some cards I have made so far. 

The monkey is only attached by a flower brad so that it can swing 

This card is for my nephew, it is nearly as cute as him.


I also used the Create a Critter cartridge make these wall decorations.  I just love them :)

A Christmas Garland

 A bit late for the jolly holiday season, I know.  But I just found these pictures on my phone so I thought I would share.  I made this garland after watching 'Kirsty's Homemade Christmas'.  It was really easy to do and I used my Cricut to cut out the hearts :)

After the success of the Heart Garland I went on to make a garland with little Christmas stockings in much brighter colours.  I never took a photograph though so I can't post it, maybe next Christmas when I put the decorations back up.